Does the following sound familiar? While patching a VMware cluster, one ESXi host does not want to enter Maintenance Mode. It appears that one or more vms cannot be migrated to another ESXi host. Manually these vms can be migrated and the host still goes into maintenance mode.

The cause is usually a VM Override that has been configured. How useful would it be if, prior to patching the ESXi hosts in the cluster, you have an overview of the vms with a VM Override.
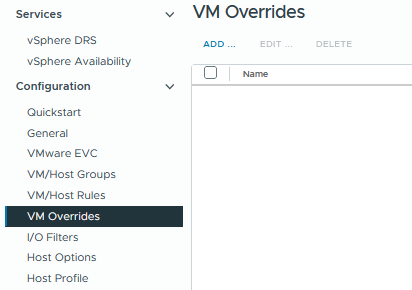
The following script lists all vms with a VM Override in an HTML page sorted by cluster.
#Version 1.0
#2025-04-28
#Check VMs in Cluster with a VM Override

# Connect to vCenter
$vcServer = Read-Host "Enter the vCenter Server name or IP address"
Connect-VIServer -Server $vcServer

# Retrieve all clusters
$clusters = Get-Cluster

# Create an empty array to store results
$results = @()

# Loop through each cluster
foreach ($cluster in $clusters) {
    Write-Output "Processing cluster: $($cluster.Name)"

    $vms = Get-VM -Location $cluster

    foreach ($vm in $vms) {
        $automationLevel = $vm.DrsAutomationLevel

        $results += [PSCustomObject]@{
            ClusterName        = $cluster.Name
            VMName             = $vm.Name
            DRSAutomationLevel = $automationLevel
        }
    }
}

# Filter: Only VMs with different automation levels
$filteredResults = $results | Where-Object {
    $_.DRSAutomationLevel -ne "AsSpecifiedByCluster" -and
    $_.DRSAutomationLevel -ne "UseClusterSettings"
}

# HTML file path
$outputHtmlPath = "D:\Temp\vm_overrides.html"

# HTML header with basic table CSS styling
$htmlHeader = @"
<html>
<head>
<title>VM DRS Overrides Report</title>
<style>
body { font-family: Arial, sans-serif; }
table { border-collapse: collapse; width: 100%; }
th, td { border: 1px solid black; padding: 8px; text-align: left; }
th { background-color: #f2f2f2; }
</style>
</head>
<body>
<h2>VMs with DRS Automation Level Overrides (VM Overrides) in vCenter $vcServer</h2>
"@

$htmlFooter = @"
</body>
</html>
"@

# Generate the HTML table from the data
$htmlTable = $filteredResults | ConvertTo-Html -Fragment -Property ClusterName, VMName, DRSAutomationLevel

# Combine everything
$htmlContent = $htmlHeader + $htmlTable + $htmlFooter

# Write to the HTML file
$htmlContent | Out-File -Encoding UTF8 -FilePath $outputHtmlPath

Write-Output "HTML report saved to: $outputHtmlPath"

# Open the HTML file with Microsoft Edge
Start-Process "msedge.exe" -ArgumentList $outputHtmlPath

# Disconnect from vCenter
Disconnect-VIServer -Server * -Confirm:$false
The HTML page looks like this.