If there is a hardware issue that could cause problems within a vSAN cluster, you want to know as early as possible. Once you know this, you may have time to resolve the issue before business is compromised.
Cause:
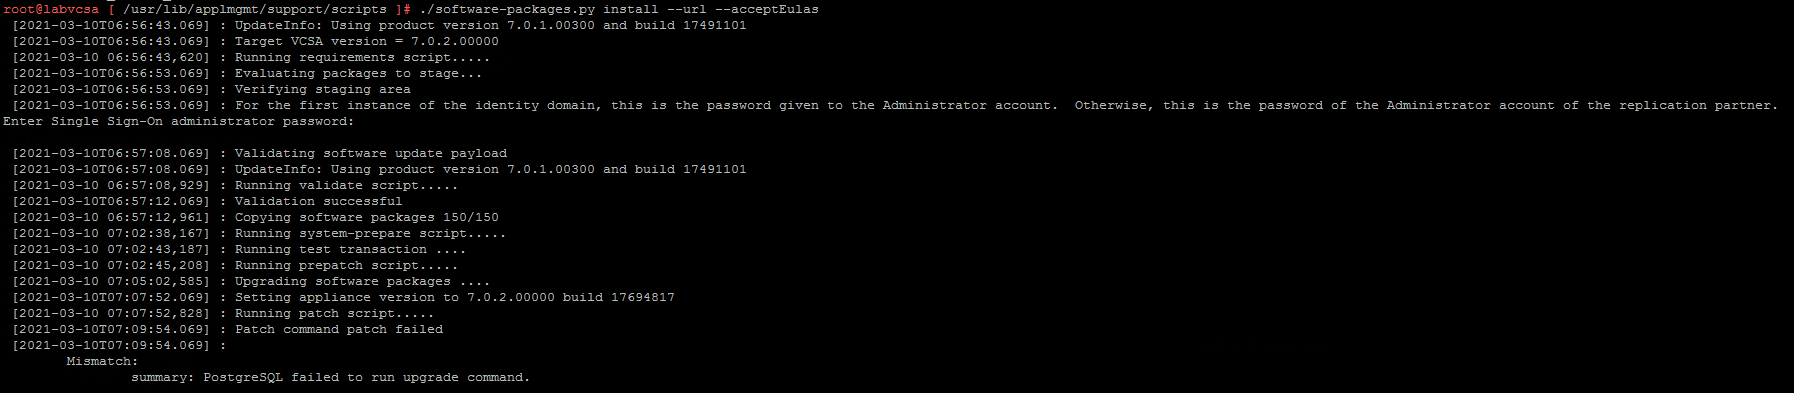
I have seen the following error several times in the results of a VxRail VxVerify check, which is performed to identify issues in a VxRail cluster before an update.
Error:
++++++++++++++++++++++
2021-10-08 15:01:00.012 esxi01.vrmware.nl vcenter-server: vSAN detected an unrecoverable medium or checksum error for component AB1234 on disk group DG5678
++++++++++++++++++++++
It could be possible that an underlying hardware device (physical disk) is causing this error. This is why you want to be informed as early as possible if there is an error that can cause an vSAN issue in the near future. This allows you to proactively carry out repair work, without any downtime to business operations.
Resolution:
How do you find out on which physical disk the component resides on? You need to identify the following information (first 3 bullets). The 4th bullet is about the vm which can be possible affected by the issue.
- VMware Host
- Diskgroup
- Disk
- Virtual Machine where the component belongs to
Let’s start to identify the disk where the component resides:
- Write down the component and diskgroup from the error
- Ssh to an arbitrary ESXI server in the vSAN cluster. It doesn’t matter what server you choose. Type the following command:
esxcli vsan debug object list –all > /tmp/objectlist.txt - Transfer /tmp/objectlist.txt to local pc
- Open objectlist.txt and search for component AB1234.
Snippet from objectlist.txt:
++++++++++++++++++++++
Configuration:
RAID_5
Component: AB1234
Component State: ACTIVE, Address Space(B): 39369834496 (36.67GB), Disk UUID: 52ec6170-5298-7f14-1069-d0d3872b742a, Disk Name: naa.PD9012:1
Votes: 1, Capacity Used(B): 39753613312 (37.02GB), Physical Capacity Used(B): 39359348736 (36.66GB), Host Name: esxi03.vrmware.nl
Type: vdisk
Path: /vmfs/volumes/vsan:1234567890/vm01.vmdk (Exists)
++++++++++++++++++++++
All the info you need to identify the disk is almost all here, VMware Host, Diskgroup and VM. To indentify the possible affected disk you need to switch to vCenter gui.
Move to Cluster > Host (esxi03.vrmware.local) > Monitor > Performance > Disks > Diskgroup (DG5678) > Whole Group (pull down). Here do you find the disk naa.PD9012
Conclusion:
Now you know that component AB1234 resides on disk naa.PD9012 in diskgroup DG5678 and the component belongs to vm01.vmdk.
I would advise always contact VMware GS for support in any production environment or Dell Support in case of a VxRail cluster. They will provide further support and help you to fix this error.
Hopefully this helps you.